How to Set Up Employee | Personal Tab

Things to Know
-
If video learning is your style, please click on video and start to learn Set up Employee in Your Payroll (watch time 7' 05").
-
If step by step instruction is your style, then keep scrolling down.
Make sure you have following before start:
-
Employee's IRD Number;
-
Employee's Contact Details, including: mobile phone number and email;
-
Employee's Photo ID (Passport or NZ driver licence);
-
Tax Code Declaration Form: IR330 (For employee) ; IR330C (For contractor) ;
-
Student Loan Letter from IRD (if available).
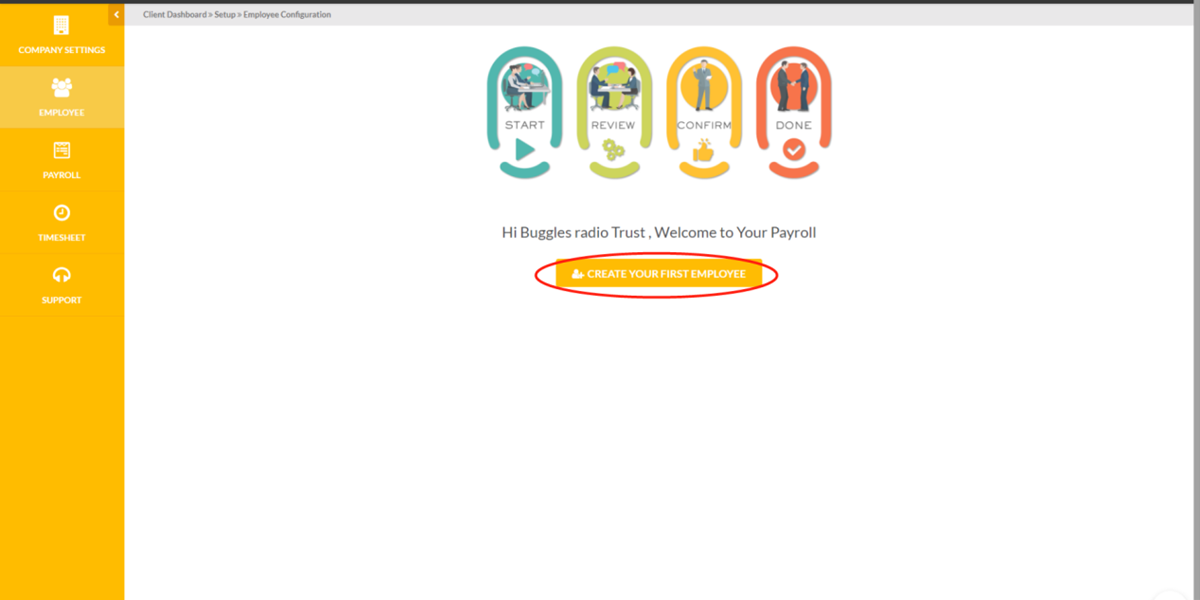
Get Started
First, go to employee page, then click “Create Your First Employee” button.
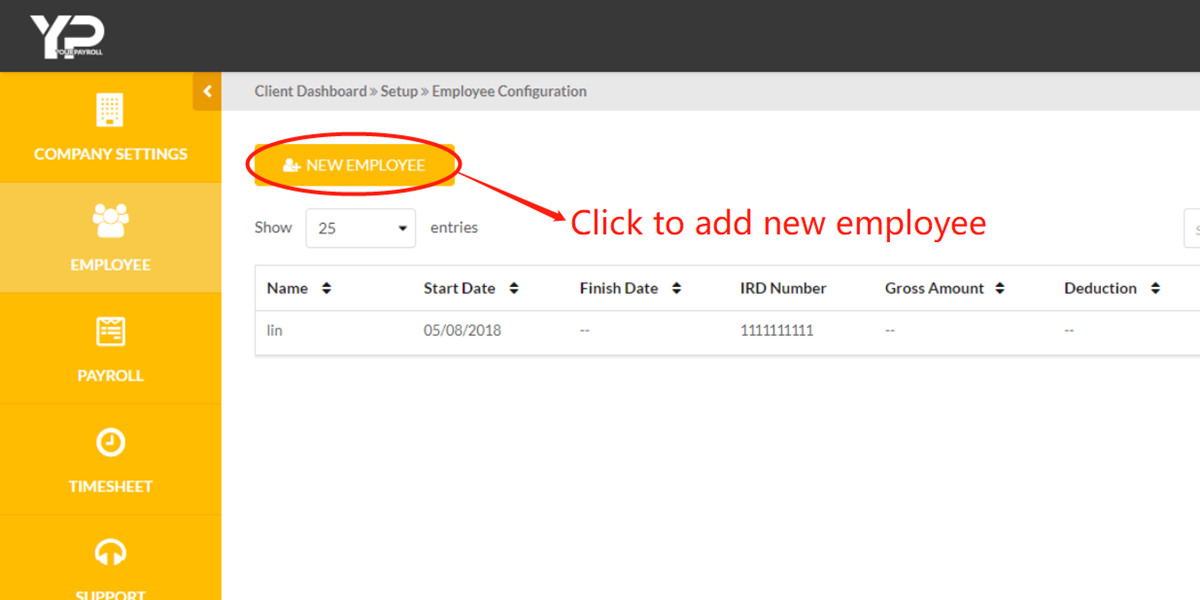
Step 2
If you already have employees in the system,
click “New Employee” button to add new employees.
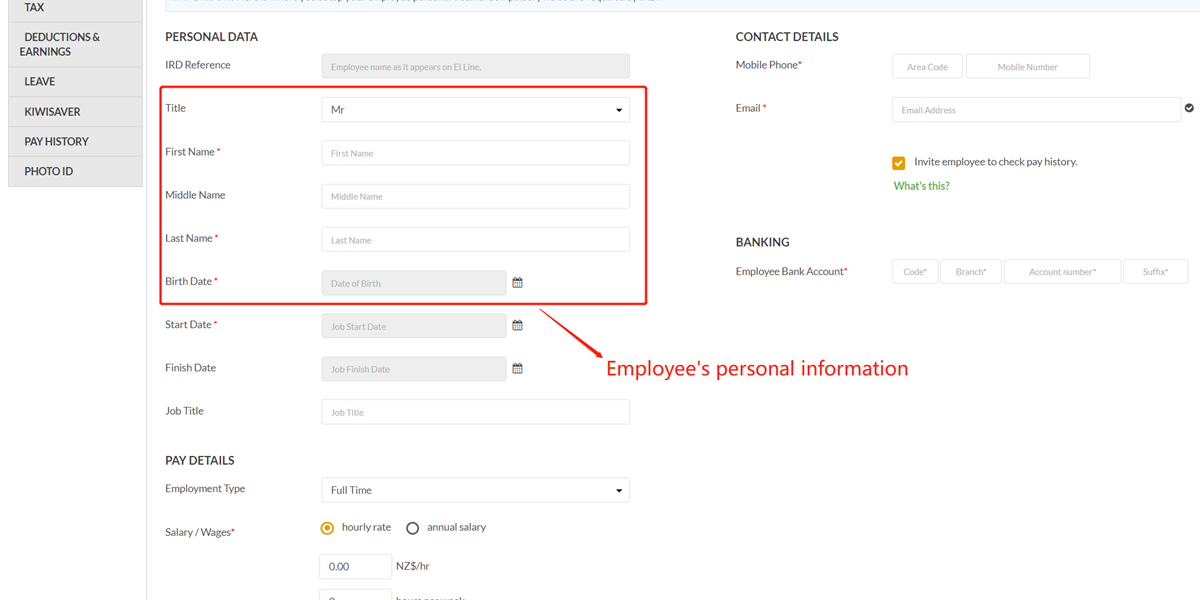
Step 3
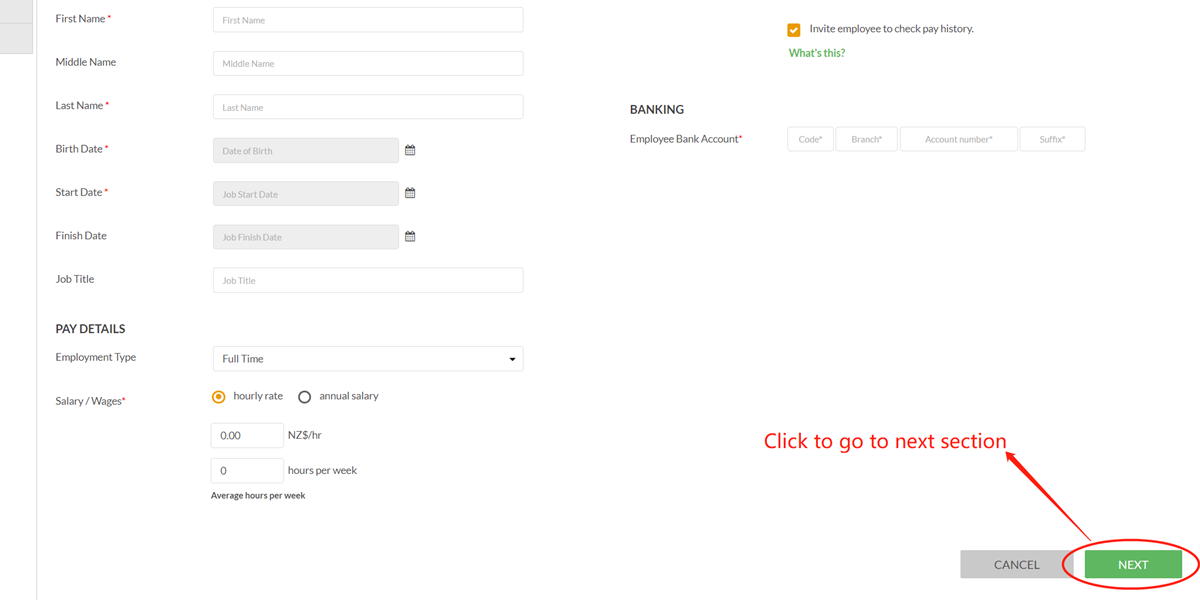
Then input employee's basic information.
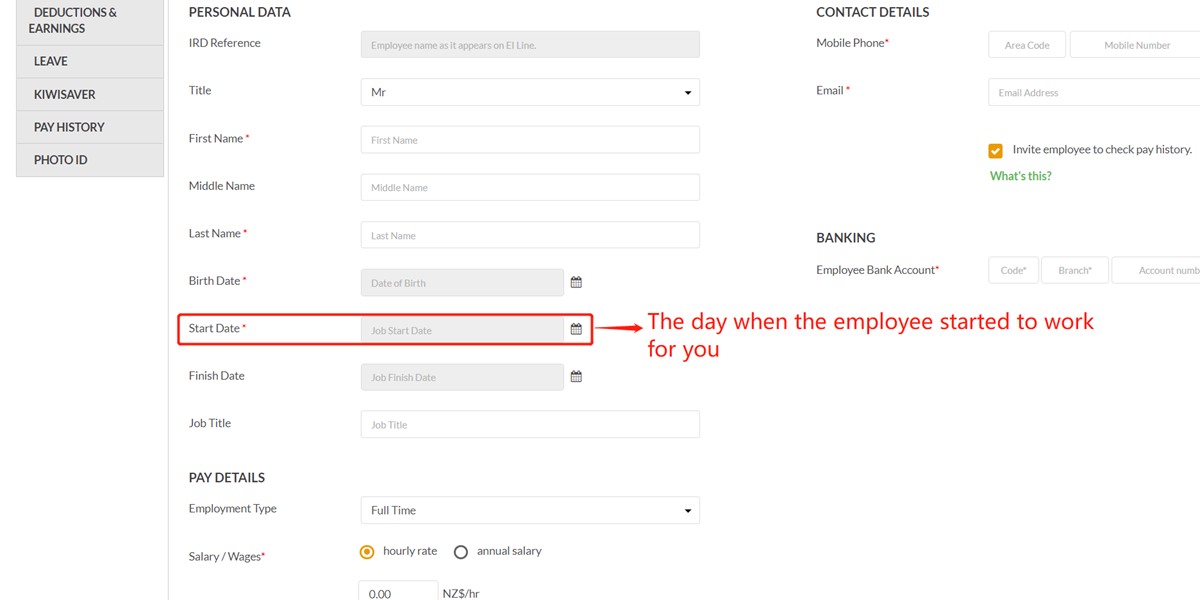
Step 4
The “Start Date” is the day when the employee started to work for you.
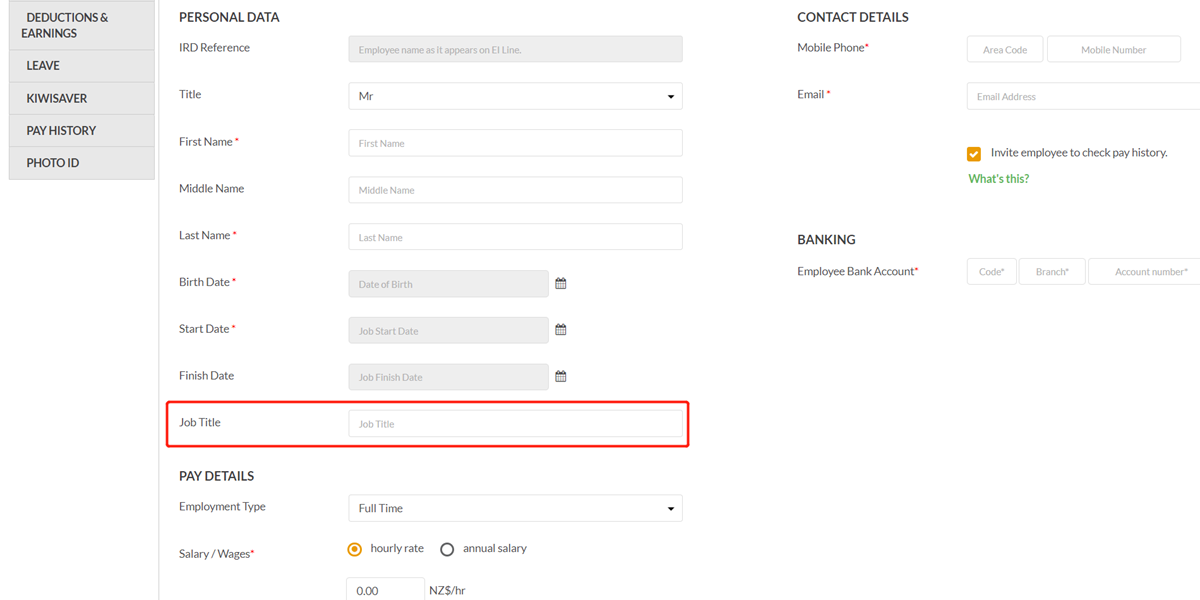
Step 5
It is recommended to input employee’s job title.
It will show in the payslips.
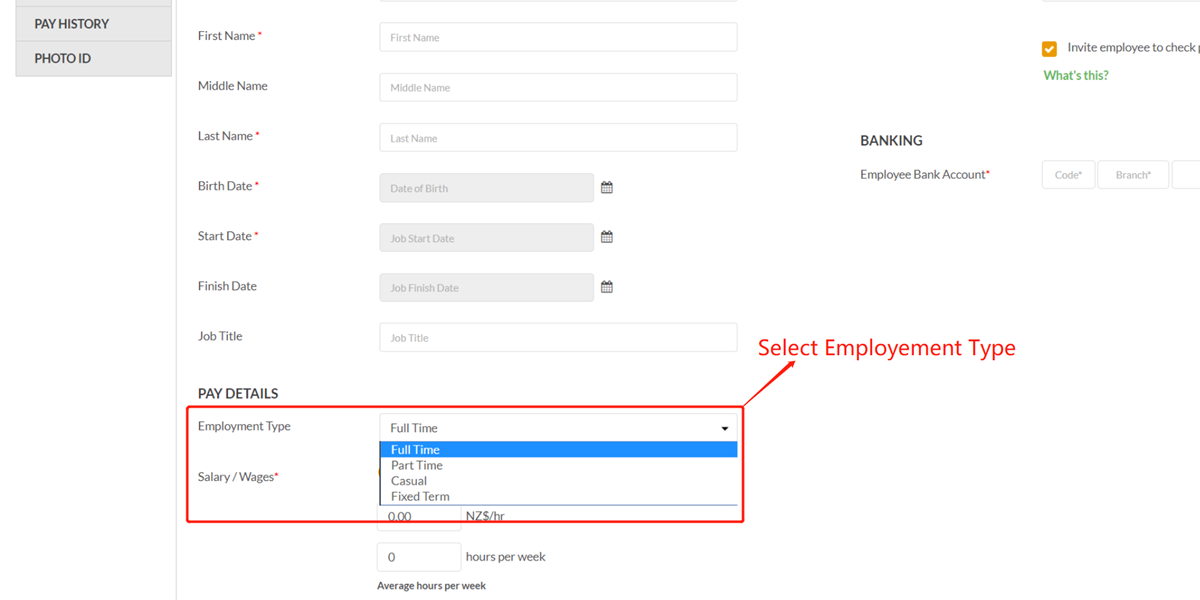
Step 6
Select "Employment Type".
NOTE: This comes from your employment agreement. If you are not sure about this, consult with your employment lawyer.
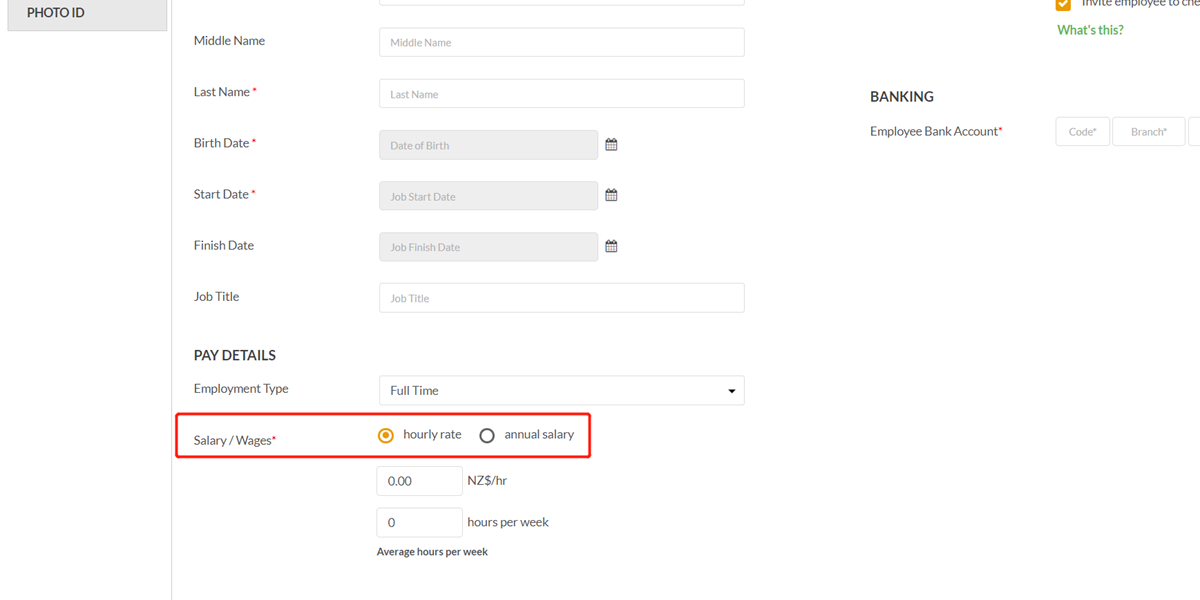
Step 7
Choose salary rate type, it can be either:
a) Hourly Rate, or;
b) Annual Salary.
NOTE: If you are not sure, please check your employment contract.
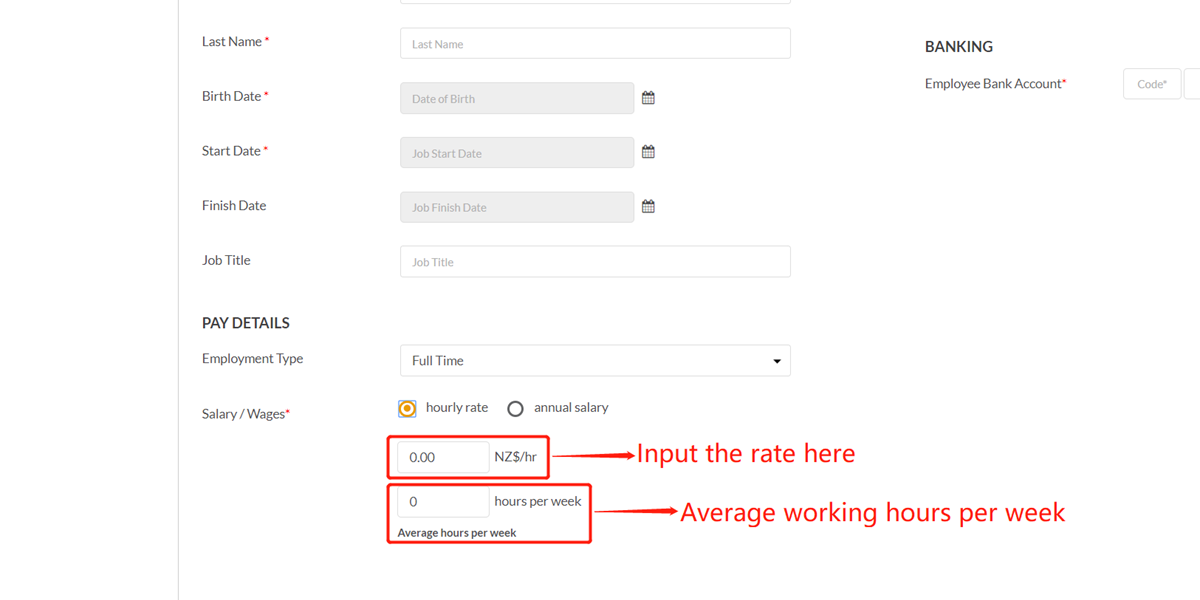
Step 8
If it’s hourly rate, input the rate and average working hours per week.
NOTE: If you are not sure, please check your employment contract.
You can always change it later.
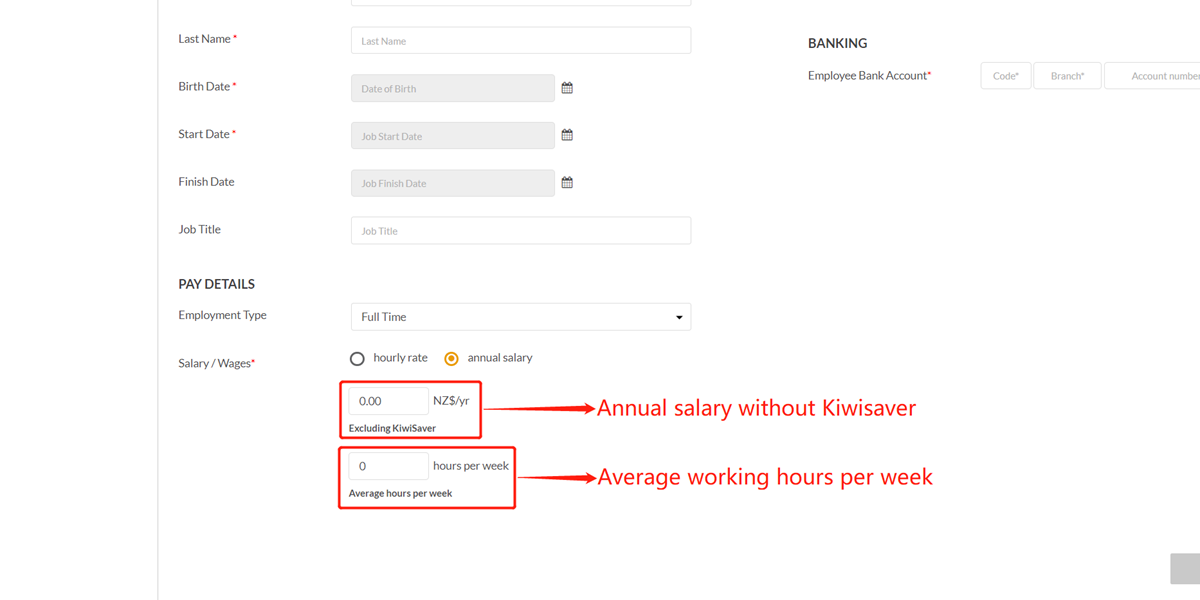
Step 9
If it’s annual salary, input the salary amount without KiwiSaver, and average working hours per week.

Step 10
Please also input:
a) Their mobile and email address (Your employee will receive payslips via this email);
b) The bank account that your employee receives the salaries.